|
     |
Certificate authentication is technically a part of the public-key authentication method. The signature created with the private key and the verification of the signature using the public key (contained in the X.509 certificate when doing certificate authentication) are done identically with both conventional public keys and certificates. The major difference is in determining whether a specific user is allowed to log in with a specific public key or certificate. With conventional public keys, every server must have every user's public key, whereas with certificates the users' public keys do not have to be distributed to the servers - distributing the public key of the certificate authority (CA) (self-signed certificate) is enough.
In brief, certificate authentication works as follows:
The client sends the user certificate (which includes the user's public key) to the server. The packet also contains random data unique to the session and signed by the user's private key.
The server uses the CA certificate (and external resources as required) to check that the user's certificate is valid.
The server verifies that the user has a valid private key by checking the signature in the initial packet.
The server matches the user certificate with the rules in the server configuration file to decide whether login is allowed or not.
Compared to conventional public-key authentication, this method is more secure because the system checks that the user certificate was issued by a trusted CA. In addition, certificate authentication is more convenient because no local database of user public keys is required on the server.
It is also easy to deny a user's access to the system by revoking his or her certificate, although this does not take effect until the next CRL update and requires that every other authentication method has been disabled. The status of a certificate can be checked either by using the Online Certificate Status Protocol (OCSP) or a certificate revocation list (CRL), which can be published either in an LDAP or HTTP repository.
OCSP is used if the certificate contains a valid Authority Info
Access extension or if an ocsp-responder has been defined in the
ssh-server-config.xml file. If no OCSP responder is defined or the OCSP
connection fails, CRLs are used. The certificate should contain a valid CRL
Distribution Point extension or an LDAP server for CRL fetching should be defined
in the ssh-server-config.xml file.
To configure the server to allow user authentication with X.509 certificates, perform the following tasks:
Acquire the CA certificate and copy it to the server machine. You can either copy the X.509 certificate(s) as such or you can copy a PKCS #7 package including the CA certificate(s).
Certificates can be extracted from a PKCS #7 package by
specifying the -7 flag with ssh-keygen-g3.
Specify the CA certificate and the CRL and OCSP settings in the
ssh-server-config.xml file. An example is shown below:
<params>
  ...
  <cert-validation socks-server-url="socks://fw.example.com:1080">
    <ldap-server address="ldap.example.com" port="389" />
    <ocsp-responder validity-period="60" url="https://ca.example.com/ocsp-1" />
    <cert-cache-file file="/var/cert-cache.dat" />
    <crl-auto-update update-before="30" minimum-interval="600" />
    <crl-prefetch interval="1800" url="http://ca.example.com/default.crl" />
    <dod-pki enable="no" />
    <ca-certificate name="exa-ca1" file="/etc/ssh2/exa-ca1.crt" />
  </cert-validation>
</params>
You can define several CA certificates by using several
ca-certificate elements. The server will accept only certificates issued
by the defined CA(s). Only the ca-certificate elements are mandatory, all
other configuration items featured above are just examples that may be used as
needed.
The SOCKS server must be defined if the OCSP and CRL (LDAP) services are located behind a firewall.
Using the Tectia Server Configuration tool, the corresponding settings can be made on the Certificate Validation page. See Certificate Validation.
Certificate authentication is a part of the publickey authentication
method. Enable public-key authentication in the ssh-server-config.xml file
and create rules that specify which certificates authorize logging into which
accounts.
The following is an example of certificate authentication rules
in the ssh-server-config.xml file:
<authentication-methods>
  <authentication action="allow">
    <auth-publickey />
    <authentication action="allow">
      <selector>
        <certificate field="ca-list" pattern="exa-ca1,exa-ca2" />
        <certificate field="issuer-name" pattern="C=FI, O=SSH, CN=*" />
        <certificate field="subject-name" pattern="C=FI, O=SSH, CN=%username%" />
        <certificate field="serial-number" pattern="123456" />
        <certificate field="altname-email" pattern="%username%@ssh.com" />
        <certificate field="altname-upn" pattern="%username-without-domain%@ssh" />
        </selector>
    </authentication>
    <authentication action="deny" />
  </authentication>
</authentication-methods>
In this example, Tectia Server tries to match all certificates offered by the
client against the certificate selectors. As the last action, access is
denied for all users whose certificates were not explicitly allowed. This is not
strictly needed, since the server automatically inserts an authentication block named
implicit-certificate-deny after other blocks to catch all certificate
authentications that do not match anything else.
In the example, users with
normal public keys will cause the authentication to end in error because the
allow-undefined attribute is not set. See also the section called “Authentication Examples”.
Certificate authentication can be
restricted using the following field attributes:
ca-list: The pattern is a comma-separated list of CA names. The names
that are defined in the ca-certificate element are used.
issuer-name: The pattern is the required certificate issuer name in
LDAP DN (distinguished name) string format. The issuer name may contain glob
patterns ('*' and '?') but only in the component values, not names. For example,
"C=FI, O=SSH, CN=*" is a legal pattern, but "C=FI, *=SSH,
CN=TestCA" is not).
subject-name: The pattern is the required subject name in LDAP DN
string format. Matching is done in similar manner as with the issuer name described
above.
serial-number: The pattern is the required serial number of the
certificate. A combination of issuer name and serial number can be used to uniquely
identify a certificate.
altname-email: The pattern is the e-mail address that must be present
in the certificate as a subject alternative name.
altname-upn: The pattern is the principal name that must be present in
the certificate as a subject alternative name.
The patterns of type subject-name,
issuer-name, altname-email and altname-upn can
also contain special strings which are processed before comparing the pattern with the
user's certificate. These strings are %username% (user's login name),
%username-without-domain% (Windows only, user's login name without the
domain part), %homedir% (user's home directory), and
%hostname% (the name of the host the user is logging from, reverse mapped
from the IP).
![[Caution]](images/caution.gif) | Caution |
|---|---|
When creating selector lists for the public-key method, make sure that every
selector ties the user name to the certificate in some way, either by including a
User name field, or by putting the special substitution string
|
Similarly, when creating selector lists for the host-based method, make
sure that every selector has a field that ties the certificate to the client host, using
the %hostname% special substitution string.
Using the Tectia Server Configuration tool, certificate authentication rules can be configured on the Authentication page. For instructions, see Configuring User Authentication with Certificates on Windows.
Run ssh-server-ctl to take the new configuration in use. See ssh-server-ctl(8).
Click Apply to take the new settings in use.
To configure Tectia Server to allow user authentication with X.509 certificates, perform the following tasks using Tectia Server Configuration GUI:
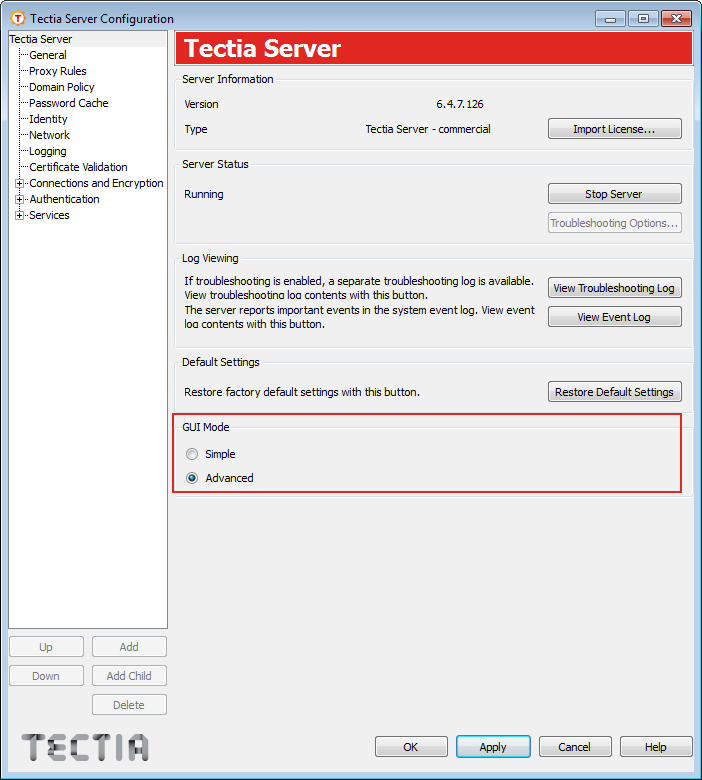
Launch Tectia Server Configuration GUI.
Select Start > All Programs > Tectia Server > Tectia Server Configuration.
Under GUI Mode, select Advanced to view all available options and groups.
Go to the Certificate Validation page and select the CA Certificates tab.
Add the trust anchors and intermediate CA certificates that are needed for the certificate validation. Root CA certificates or intermediate CA certificates can be added as trust anchors. Normally you need to add only the CA certificate that can issue certificates for the users into Tectia Server configuration. That is, you need not create the whole trust path in the configuration.
![[Note]](images/note.gif) | Note |
|---|---|
CA certificates are by default added to the CA Certificates list as trust anchors, meaning that revocation checks are not performed on them. When adding a new intermediate CA certificate, clear the Trusted CA check box to enable revocation checks. |
| Note |
|---|---|
In case you have an LDAP server in use, you only need to add the root CA
certificate into the server configuration. Tectia Server can retrieve the intermediate CA
certificates that are issued by the root CA certificate automatically from the LDAP
server. For example, if |
For more information about certificate validation, see Certificate Validation .
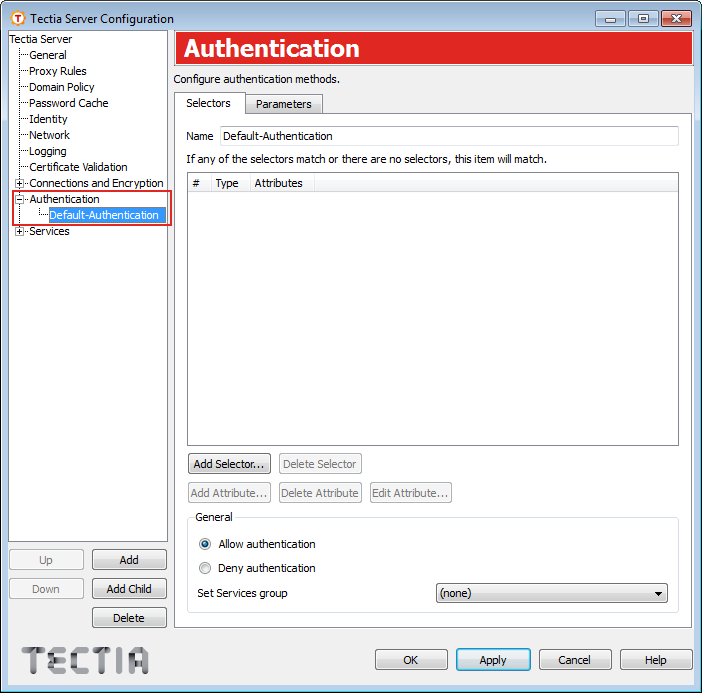
Go to Authentication and select Default Authentication to configure selectors and parameters for the group. Note that this authentication group is available in the default configuration of Tectia Server.
On the Selectors tab, enter a name for the authentication group.
Leave the selectors list empty, all incoming users are selected into this authentication group and to the authentication method chain. This is the first authentication group that you need to create for the authentication method chain. There will be two authentication groups in the chain.
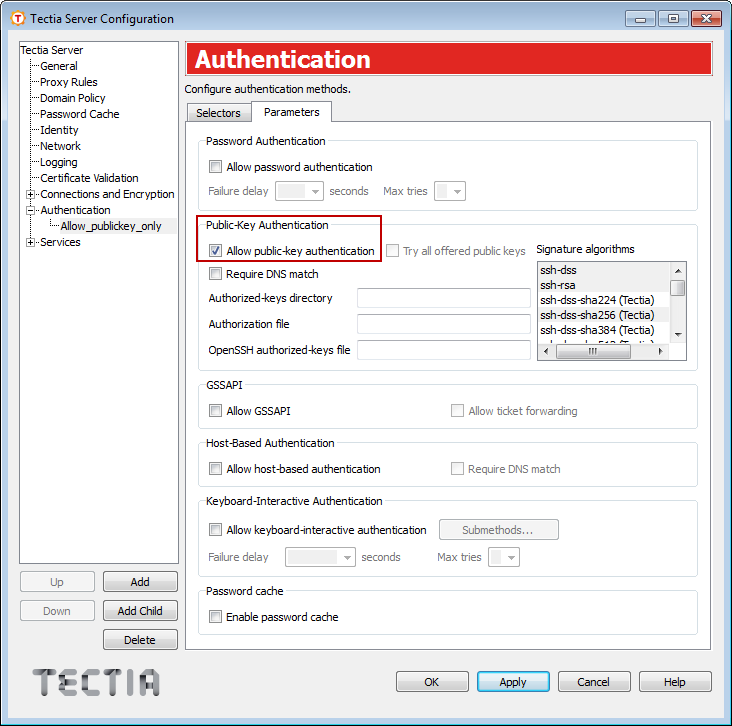
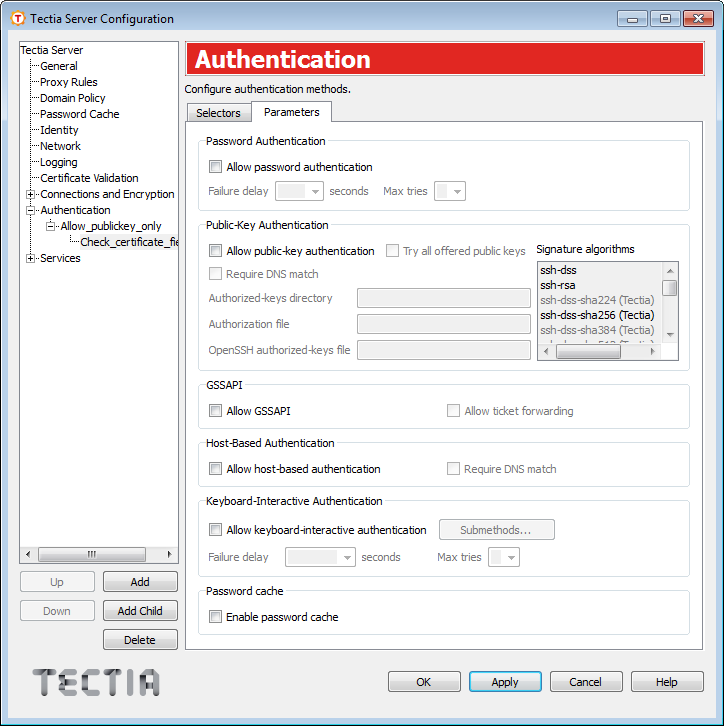
On the Parameters tab, make sure that the Allow public-key authentication option is selected.
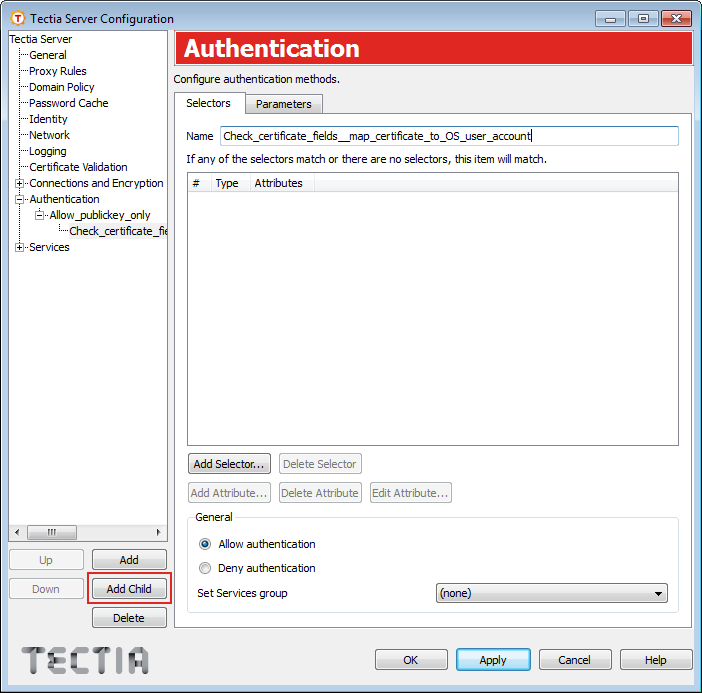
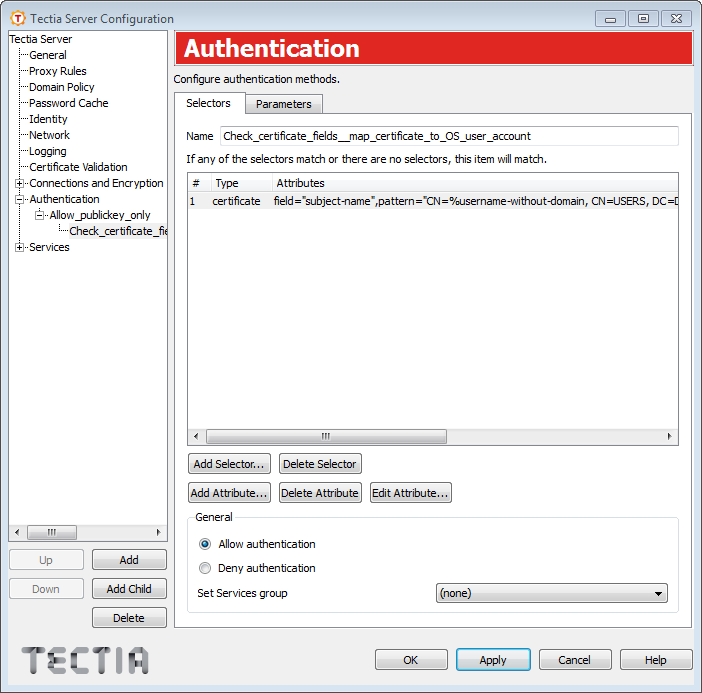
Create a child authentication group which will be used to check certain fields from the end user's certificate. That is, you are configuring your selector for the certificates. Click the button and enter a name for the child authentication group.
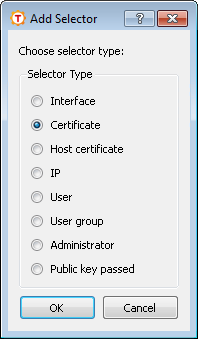
On the Selectors tab of the child authentication group, click the button. From the list, select Certificate and click .
In the Certificate Selector dialog box, select which field on the certificate you wish to authenticate against.
Enter the pattern in the field.
It is extremely important to create a mapping between real OS user accounts and the end users' certificates so that a single end user can only access a single specific OS user account with their personal certificate and not all OS user accounts. For example, if you use subject-name, the pattern could be:
CN=%username-without-domain%, CN=USERS, DC=DEMO, DC=SSH, DC=COM
Once you have made your changes, click .
On the Parameters tab, unselect all authentication methods because the parent authentication group checks whether the public key authentication is successful.
Click to save your changes.
You need to configure user authentication with certificates in Tectia Client also. For more information, see Tectia Client User Manual.
For more information about the authentication settings, see Authentication.
You can troubleshoot problems in user authentication with certificates by taking the following steps:
Check that the server authentication phase is successful. When using x509v3 certificates, server authentication issues can sometimes stop client connections in the very beginning. Information about the server authentication issues must be checked from the client-side logs.
Check the Windows Event Log. Tectia Server's log messages are stored into the Application sublog.
If the logs do not show a clear reason for the user authentication problem, start Tectia Server in troubleshooting mode. Inspect the debugging messages using the tool in Tectia Server Configuration GUI (see Starting Tectia Server in Debug Mode on Windows).
| |