|
     |
Tectia Server can be used for automated secure file transfer. This use case shows how to configure Tectia Server for it. Tectia Client does not require any configuration changes.
The goal of changing the Tectia Server configuration is to improve the security of the system for automated file transfers. This requires some user restrictions on the SFTP usage. In this use case, the following restrictions are defined on Tectia Server:
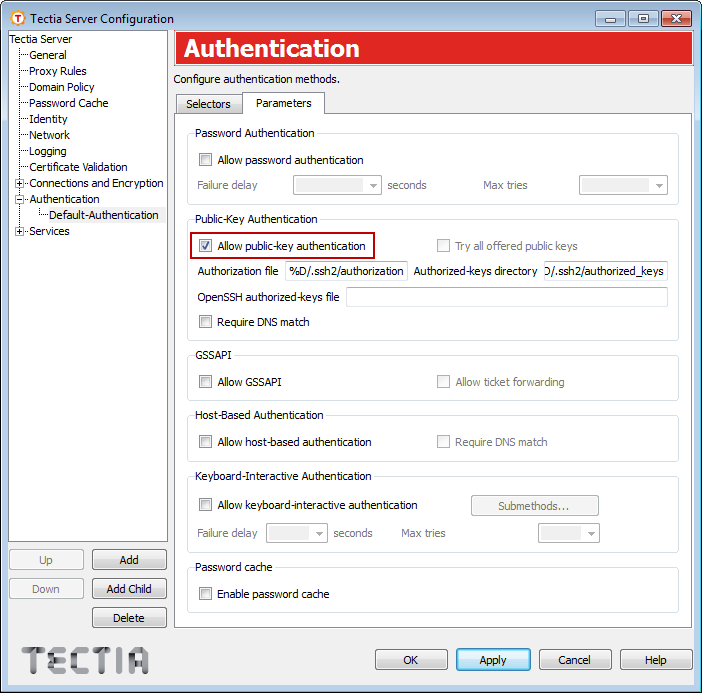
Public keys are the only allowed authentication method. See instructions in Enabling Public-Key Authentication.
SFTP service is allowed only for specially created user groups SFTP-users
and admin. SFTP service is denied from all other users. See
instructions in Settings for the Admin Group, Settings for the SFTP-users Group and Settings for the Rest of Users.
Members of SFTP-users have access to their user-specific home folders
only. This can be defined with virtual folders. See instructions in
Settings for the SFTP-users Group and Figure 5.14.
Terminal access is allowed only for administrators; from everyone else, it is denied. See instructions in Settings for the Admin Group and Settings for the Rest of Users.
On Windows, Tectia Server is configured through a graphical user interface.
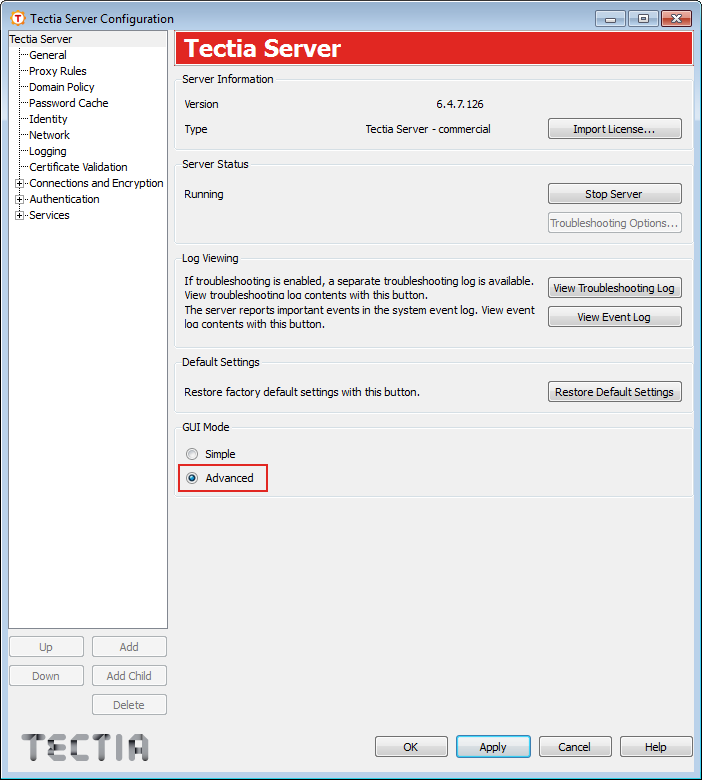
Open the Tectia Server Configuration GUI by clicking Start → (All) Programs → Tectia Server → Tectia Server Configuration.
To access the necessary Tectia Server configuration settings, enable the advanced settings by clicking Advanced under GUI Mode on the Tectia Server view:
Now proceed to the actual configuration settings. See the example views below.
Define public-key authentication as the only allowed authentication method under the Authentication - Default-Authentication page, on the Parameters tab.
Create a user group with administrator rights and allow all actions and services for the members of the group.
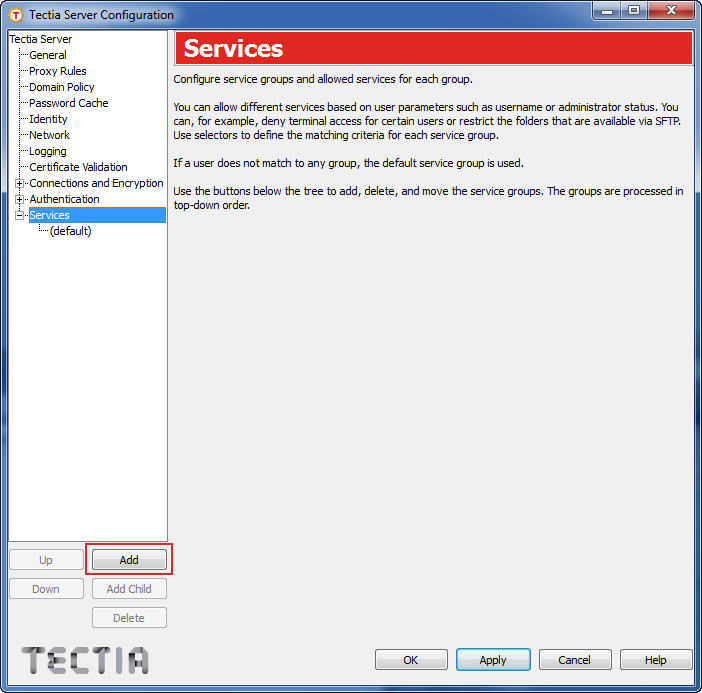
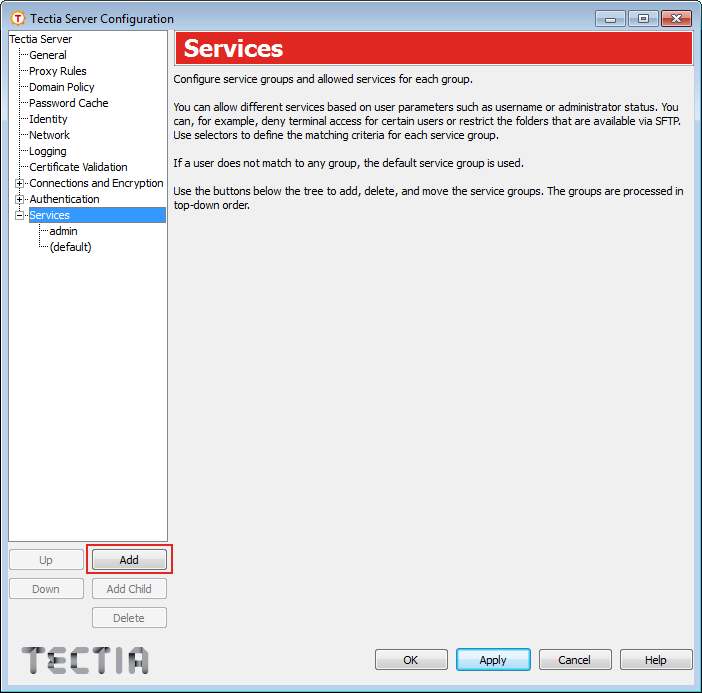
Under the Services page, click Add to create a group for administrators.
Tectia Server will use a placeholder name group1 for a newly created group.
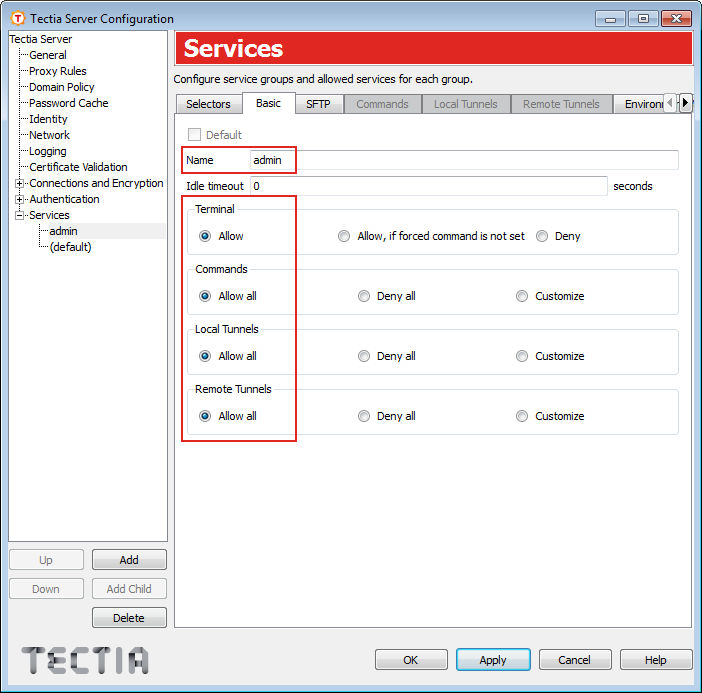
On the Basic tab, name the group admin and choose
Allow or Allow all for all services,
Terminal, Commands, Local Tunnels, and Remote
Tunnels.
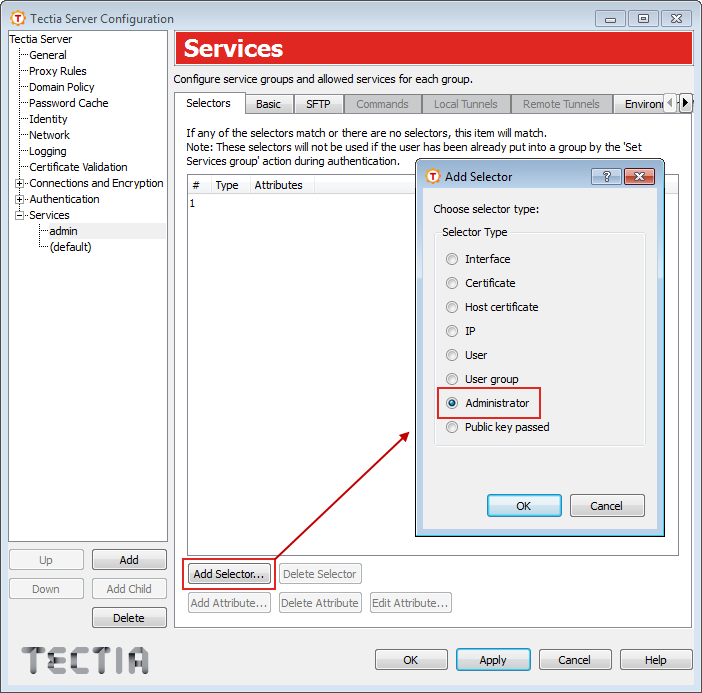
Go to the Selectors tab, and click Add Selector. On the Add Selector tab, choose selector type Administrator, and click OK.
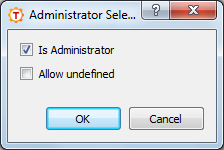
When the Administrator Selector view opens, select Is Administrator, and click OK.
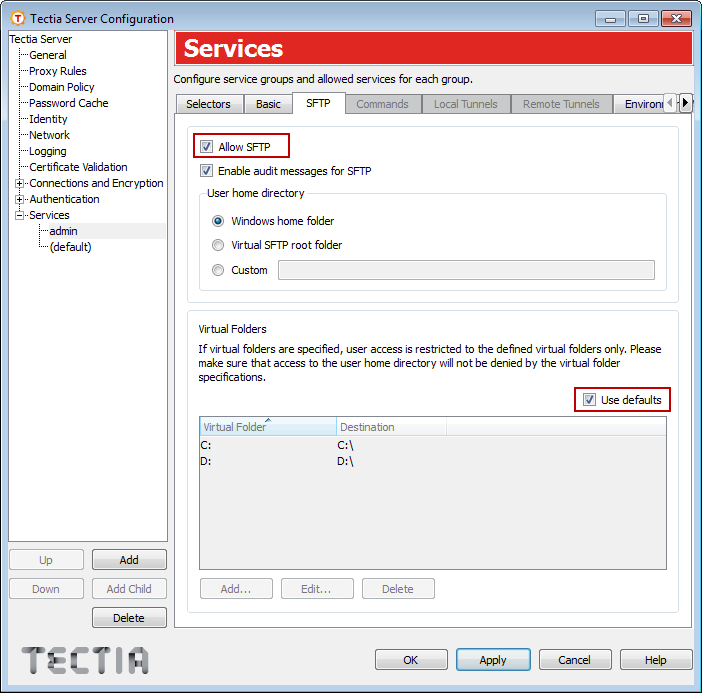
On the SFTP tab, allow the SFTP service for the
admin group, and keep the default settings.
Create a dedicated user group for secure file transfer users. An existing operating-system-related user group is attached to the Tectia SFTP group, and they are allowed access only to their user-specific home folders.
Under the Services page, click Add to create a group for SFTP users.
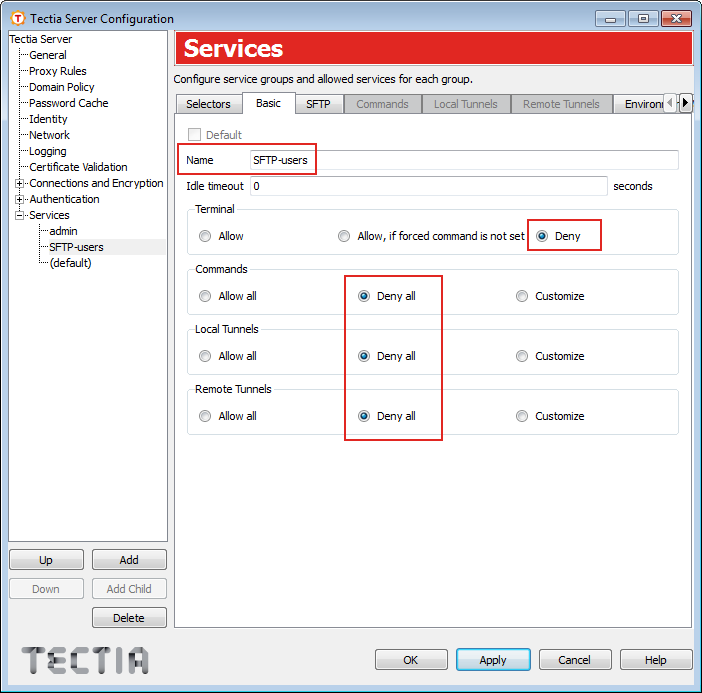
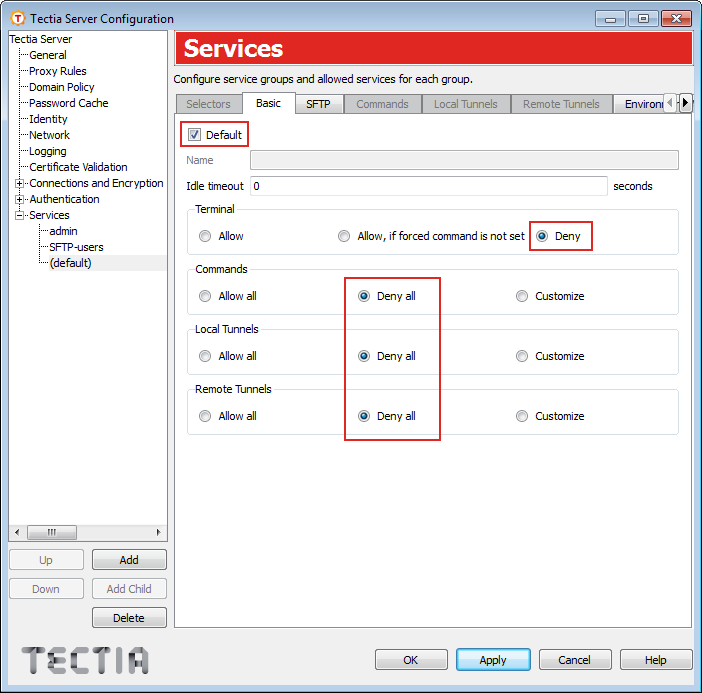
On the Basic tab, name the group SFTP-users and
choose Deny or Deny all for all the listed
services, Terminal, Commands, Local Tunnels, and Remote
Tunnels. For more information on restricting terminal access, see Settings for the Rest of Users.
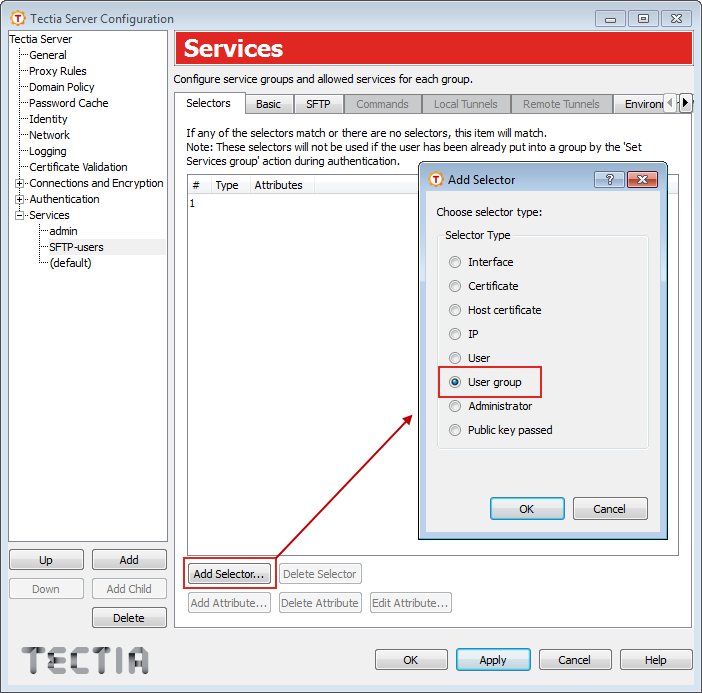
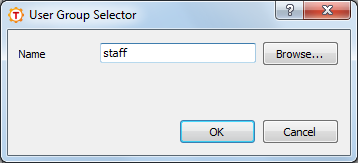
On the Selectors tab, click Add Selector and choose the selector type User Group, and click OK.
When the User Group Selector view opens, attach the relevant
existing operating-system-related user group (named staff in this example)
to the group.
Data on the newly created group selectors appears on the Selectors tab.
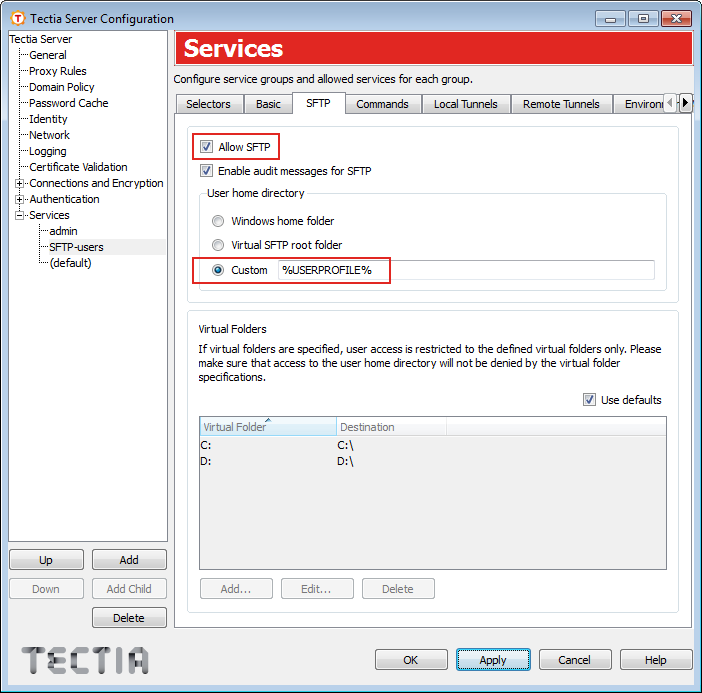
On the SFTP tab, allow the SFTP service for the
SFTP-users and define the User Home Directory for the
user group. This is the SFTP starting directory. Use the default
%USERPROFILES%, as shown in the following figure.
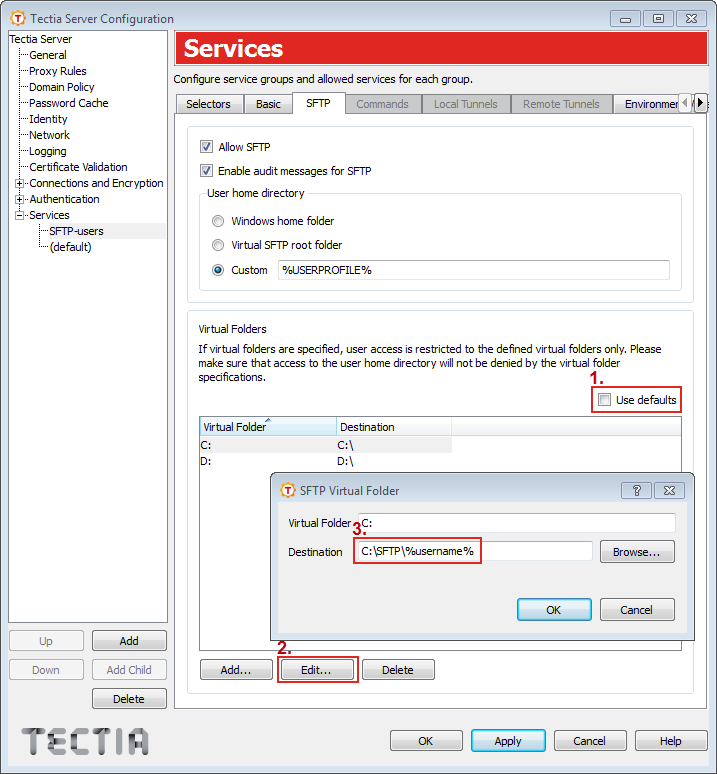
To define Virtual Folders for the user group, first clear the
Use defaults check box on the SFTP tab. Then
select C: from the Virtual Folder list and click the
Edit button. When the SFTP Virtual Folder
dialog opens, define the virtual folder as C:, and its destination as the
user-specific subdirectory under the SFTP directory on the C:
drive (when users change directory to C:, they are actually directed to
their user-specific SFTP directory). The session starts in the user's home directory. No
other directory can be accessed via SFTP.
By default, file access by the user using the SFTP subsystem is restricted by the file system access controls. You can define more restrictions by defining virtual folders on Windows.
By default, if no virtual folders are explicitly defined in the configuration, the
user can access all drives via SFTP and SCP operations, the user's SFTP session starts
in the C:\SFTP\%username% directory, and that is the target
directory for SCP operations.
When any virtual folders are defined, the user access is limited to the specified folders only. Note that the user's home directory must be under one of the defined virtual folders.
![[Note]](images/note.gif) | Note |
|---|---|
The virtual SFTP root directory is not an actual directory on disk and no files can be written there. |
The value of virtual folder can contain the same special strings as the value of
home (%username%, %username-without-domain%,
%homedir%, and %hostname%).
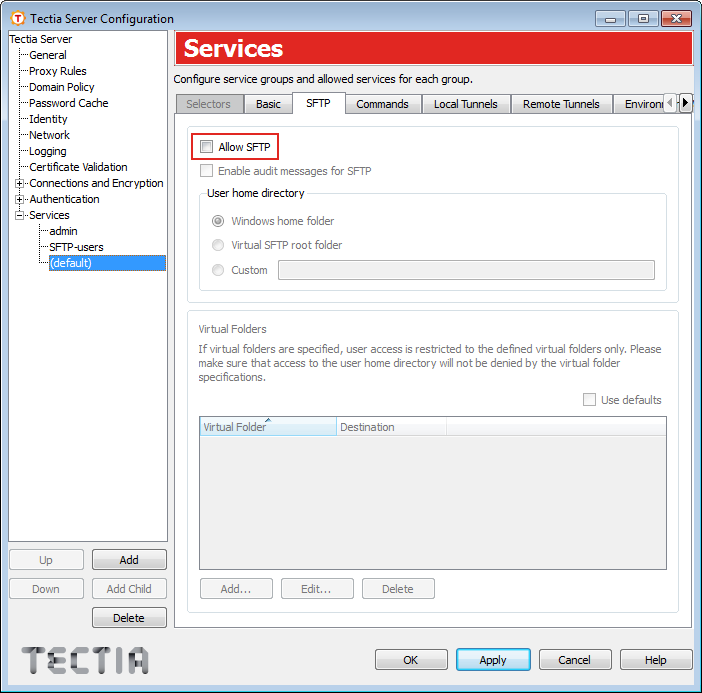
The default service settings are applied to all users who do not belong to
the admin group or the SFTP group. Deny all services from them on the
Basic and SFTP tabs.
Notice that denying the terminal service, denies also X11 and agent forwarding and shell commands for the specified group (unless some commands are explicitly allowed).
| |