|
     |
This section gives instructions on installing Tectia Client locally on the supported operating systems.
See the installation instructions for Tectia Client per platform in the following sections.
The downloaded installation package contains the compressed installation files.
Two packages are required: one for the common components of Tectia Client and Server, and one for the specific components of Tectia Client.
To install Tectia Client on AIX, follow the instructions below:
Unpack the downloaded tar
package.
Unpack the installation packages:
$ uncompress ssh-tectia-common-<version>-aix-6-7-powerpc.bff.Z
$ uncompress ssh-tectia-client-<version>-aix-6-7-powerpc.bff.Z
In the commands, <version> is the current package
version of Tectia Client (for example, 7.0.1.123).
Install the packages by running the following commands with root privileges:
# installp -d ssh-tectia-common-<version>-aix-6-7-powerpc.bff SSHTectia.Common
# installp -d ssh-tectia-client-<version>-aix-6-7-powerpc.bff SSHTectia.Client
Copy the license file to directory: /etc/ssh2/licenses.
(This is not necessary in "third-digit" maintenance updates.)
See also Licensing.
Tectia Client for Linux platforms is supplied in RPM (Red Hat Package Manager) binary packages for Red Hat Enterprise Linux and SUSE Linux running on the 64-bit x86-64 platform architecture.
The downloaded installation package contains the RPM installation files. Two packages are always required: one for the common components of Tectia Client and Server, and one for the specific components of Tectia Client. If you want to use the product with a graphical user interface (GUI), install also the optional GUI support package.
To install Tectia Client on Linux, follow the instructions below:
Unpack the downloaded tar
package.
When installing on SUSE or Red Hat Enterprise Linux versions running on the 64-bit x86-64 architecture, use the packages named:
ssh-tectia-common-<version>-linux-x86_64.rpm
ssh-tectia-client-<version>-linux-x86_64.rpm
ssh-tectia-guisupport-<version>-linux-x86_64.rpm
In the commands, <version> indicates the product
release version and the current build number (for example,
7.0.1.123).
Install the packages with root privileges:
# rpm -ivh ssh-tectia-common-<version>-linux-x86_64.rpm
# rpm -ivh ssh-tectia-client-<version>-linux-x86_64.rpm
# rpm -ivh ssh-tectia-guisupport-<version>-linux-x86_64.rpm
Or upgrade the packages if you already have an older Tectia Client version installed:
# rpm -Uvh ssh-tectia-common-<version>-linux-x86_64.rpm
# rpm -Uvh ssh-tectia-client-<version>-linux-x86_64.rpm
# rpm -Uvh ssh-tectia-guisupport-<version>-linux-x86_64.rpm
Copy the license file to the /etc/ssh2/licenses directory.
(This is not necessary in "third-digit" maintenance updates.) See
also Licensing.
Before you can run the PrivX Desktop client GUI, you will need to install the following dependencies:
On SUSE:
# zypper install libxcb-cursor0
On RHEL/Rocky:
# dnf install xcb-util-wm xcb-util-keysyms xcb-util-cursor
![[Note]](images/note.gif) | Note |
|---|---|
You need to enable the EPEL repository to obtain some of the dependencies. Extra dependencies for PrivX Desktop have been verified on RHEL/Rocky 8.x and later, and may need to be adapted for other RPM-based distributions. |
Tectia Client for Debian GNU/Linux is supplied in Debian (DEB) binary packages for Ubuntu and Debian running on the 64-bit x86-64 architecture.
The Tectia installation bundle contains the DEB installation files and the license file.
To install Tectia Client on Debian Linux, follow the instructions below:
Download the relevant installation bundle according to your license type:
Commercial Tectia Quantum Safe Edition License:
tectia-client-<version>-linux-ubuntu-x86_64-comm-pqc.tarCommercial License:
tectia-client-<version>-linux-ubuntu-x86_64-comm.tarEvaluation:
tectia-client-<version>-linux-ubuntu-x86_64-upgrd-eval.tarIn the package names, <version> corresponds to
the release version and build number, for example
7.0.1.123-1.
Unpack the downloaded tar package.
Select the installation packages. Two packages are always required: one for the common components of Tectia Client and Server, and one for the specific components of Tectia Client.
ssh-tectia-common-<version>_linux-x86_64.deb
ssh-tectia-client-<version>_linux-x86_64.deb
Install the packages with root privileges:
# dpkg -i ssh-tectia-common-<version>_linux-x86_64.deb
# dpkg -i ssh-tectia-client-<version>_linux-x86_64.deb
Copy the license file to the /etc/ssh2/licenses directory.
(This is not necessary in "third-digit" maintenance
updates.)
Before you can run the PrivX Desktop client GUI, install the following dependencies:
# apt install libxcb-cursor0
| Note |
|---|---|
Extra dependencies for PrivX Desktop have been verified on Ubuntu, and may need to be adapted for other Debian-based distributions. |
The macOS installation package is provided in the PKG (Installer Package) format for macOS versions running on the ARM platform architecture.
The installation package is a Disk Imagea (DMG) file containing the license file and the executable Installer (PKG) packages.
You must have administrative privileges to install Tectia Client on macOS.
To install Tectia Client on macOS, do the following:
Click the installation dmg file to open the Disk Image.
| Note |
|---|---|
The license file will be automatically imported to the correct location when you run the installer PKG in a commercial Disk Image. |
Locate the correct installation file
ssh-tectia-client-,
where:<version>-mac-arm64.pkg
<version> shows the Tectia Client/Server release version and
build number, for example 7.0.1.123.
Double-click the installation file, and the Installer will start.
Follow the Installer through the installation steps and fill in information as requested.
When the installation has finished, click Close to exit the Installer.
The default installation directory is:
"/Applications"
The downloaded installation package contains the compressed installation files.
Two packages are required: one for the common components of Tectia Client and Server, and one for the specific components of Tectia Client.
Tectia Client includes support for Zones on Solaris 11. The Tectia software can be installed into the global and local zones. When the Tectia software is installed into the global zone, it becomes automatically installed also into the existing local zones. However, if the local zones are added into the system later, the Tectia Client needs to be separately installed on them.
In case you are installing Tectia Client into a sparse zone, note that
the installation process will report a failure in creating symlinks. The actual installation
is finished successfully, but you need to manually add the
/opt/tectia/bin to the path settings.
For information on the Solaris Zones, see the Oracle documentation: System Administration Guide: Solaris Containers-Resource Management and Solaris Zones.
To install Tectia Client on Solaris, follow the instructions below:
Unpack the downloaded tar package.
When installing on Solaris version 11 running on the SPARC architecture, use the packages named:
ssh-tectia-common-<version>-solaris-11-sparc.pkg.Z
ssh-tectia-client-<version>-solaris-11-sparc.pkg.Z
When installing on Solaris version 11 running on the x86-64 architecture, use the packages named:
ssh-tectia-common-<version>-solaris-11-x86_64.pkg.Z
ssh-tectia-client-<version>-solaris-11-x86_64.pkg.Z
In the commands, <version> indicates the product
release version and the current build number (for example,
7.0.1.123).
Unpack the installation packages to a suitable place. The standard place is
/var/spool/pkg in Solaris environment. In the command examples
below, we use Solaris 11 x86-64:
$ uncompress ssh-tectia-common-<version>-solaris-11-x86_64.pkg.Z
$ uncompress ssh-tectia-client-<version>-solaris-11-x86_64.pkg.Z
Install the packages with the pkgadd tool with root privileges:
# pkgadd -d ssh-tectia-common-<version>-solaris-11-x86_64.pkg all
# pkgadd -d ssh-tectia-client-<version>-solaris-11-x86_64.pkg all
Copy the license file to directory: /etc/ssh2/licenses
(This is not necessary in "third-digit" maintenance updates.) .
The Windows installation packages are provided in the MSI (Windows Installer) format for Microsoft Windows versions running on the 64-bit (x86-64) platform architecture.
The downloaded installation package is a zip file containing the license file and the executable Windows Installer (MSI) package.
The installation is carried out by a standard installation wizard. The wizard prompts you for information, copies the program files, and sets up the client.
| Note |
|---|---|
If you want to install both Tectia Client and Tectia Server on the same machine, you must install both
products using the Tectia Server installer
|
If you are upgrading a previous installation of Tectia Client, see first Upgrading Previously Installed Tectia Client Software.
To install Tectia Client on Windows, follow the instructions below:
Extract the installation zip file contents to a temporary location.
Locate the correct Windows Installer file
ssh-tectia-client-,
where:<version>-windows-<platform>.msi
<version> shows the Tectia Client/Server release version and
build number, for example 7.0.1.123.
<platform> shows the platform architecture
x86_64 for 64-bit Windows versions.
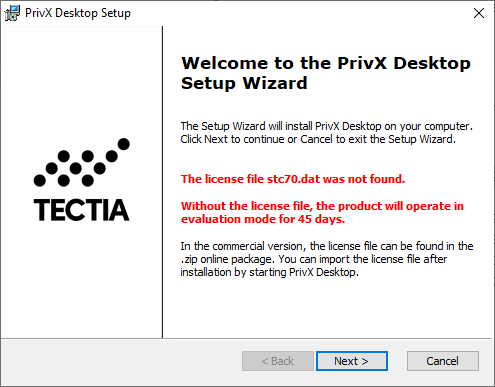
Double-click the installation file, and the installation wizard will start.
| Note |
|---|---|
The license file will be imported automatically, when you extract the contents of
the If you run the
On Windows 10, Tectia packages downloaded via browser may trigger a Windows protected your PC warning. In such cases, proceed with the installation by clicking More info and Run anyway. |
Follow the wizard through the installation steps and fill in information as requested.
The Typical installation of Tectia Client includes the sshg3.exe, scpg3.exe, and sftpg3.exe command-line tools, and the graphical user interface for terminal and file transfer.
To also install Transparent TCP Tunneling (described in Transparent TCP Tunneling on Windows), select Complete when the wizard prompts for the setup type.
To select specific components to install, select Custom when the wizard prompts for the setup type. The next dialog box allows you to exclude some of the components from the installation. See Figure 2.2.
When the installation has finished, click Finish to exit the wizard.
You have to restart the computer after installing Tectia Client. Click Yes to restart.
The default installation directory is:
"C:\Program Files (x86)\SSH Communications Security\SSH Tectia" on 64-bit Windows versions
Tectia Client can also be installed silently on a workstation. Silent (non-interactive) installation means that the installation procedure will not display any user interface and will not ask any questions from the user. This option is especially useful for system administrators, as it allows remotely-operated automated installations.
In silent mode, Tectia Client is installed with the default settings and without any additional features.
The following command can be used to install Tectia Client silently:
msiexec /q /i ssh-tectia-client-<version>-windows-<platform>.msi INSTALLDIR="<path>"
In the command:
<version> shows the current version of
Tectia Client, for example 7.0.1.123.
<platform> shows the platform architecture
x86_64 for 64-bit Windows versions.
<path> is the path to the desired installation
directory. If the INSTALLDIR variable is omitted, Tectia Client is
installed to the default location.
| |