|
     |
Under User Authentication, you can configure settings related to public-key and certificate authentication. See Managing Keys and Certificates and Managing Key Providers.
To enable or disable public-key authentication, see Defining Default Connection Settings and Defining Authentication.
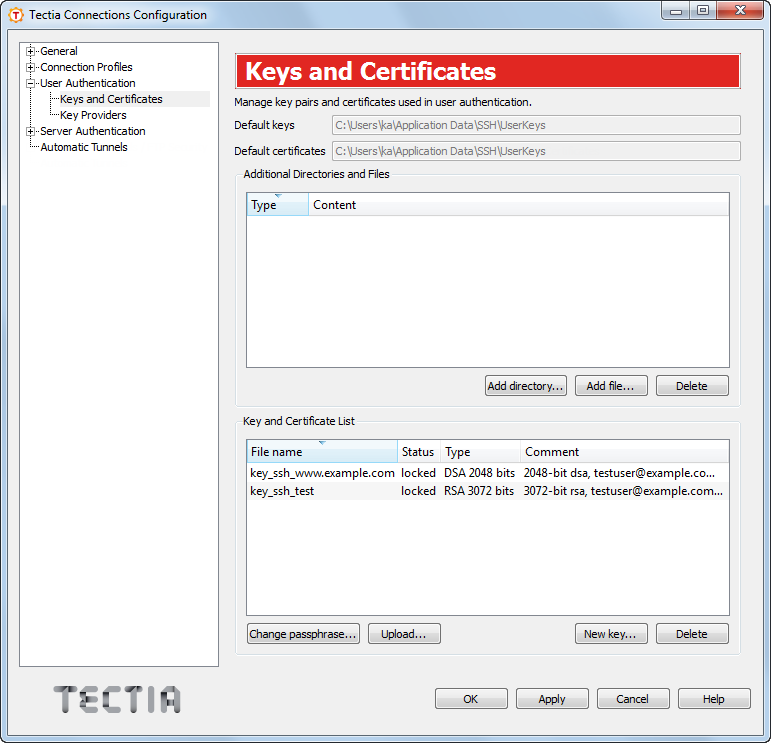
On the Keys and Certificates page, you can add key and certificate files used in user authentication and directories for them, generate a new key, upload a key to a server, or change the passphrase for a key.
The default location of user keys.
The default location of user certificates.
Additional key directories and files explicitly added to the Tectia Client configuration.
Click the Add directory button to add a directory of keys or certificates.
Click the Add file button to add a key or certificate file.
Select a directory or a file and click the Delete button to remove it. The reference to the directory, the key or certificate file is removed from the configuration. The keys themselves are not removed from the disk.
All public keys and certificates known to Tectia Client are listed in this field. That is, those keys and certificates stored in locations in Default keys, Default certificates and Additional Directories and Files fields. Also the keys and certificates from external key providers are shown here (see Managing Key Providers.
The value shown in the Status field can be:
locked - The file is passphrase protected and the passphrase is not known to the Connection Broker. Uploading the file to a remote host unlocks it.
open - The passphrase is known to the Connection Broker.
If the field is empty, the file is not passphrase protected.
You can modify the key details by selecting a key file in the list and clicking a button at the bottom.
Click Change passphrase to change the passphrase of a selected key. Note that the command may not be supported for all key types.
Click Upload to upload the key to a remote server. You can only upload plain public keys. See also Uploading Public Keys Automatically.
Click New key to start the key generation wizard. The new key will be added to the Default keys directory and it will become visible in the Key and Certificate List field. For a description of the wizard, see Using the Public-Key Authentication Wizard.
![[Note]](images/note.gif) | Note |
|---|---|
The user-specific |
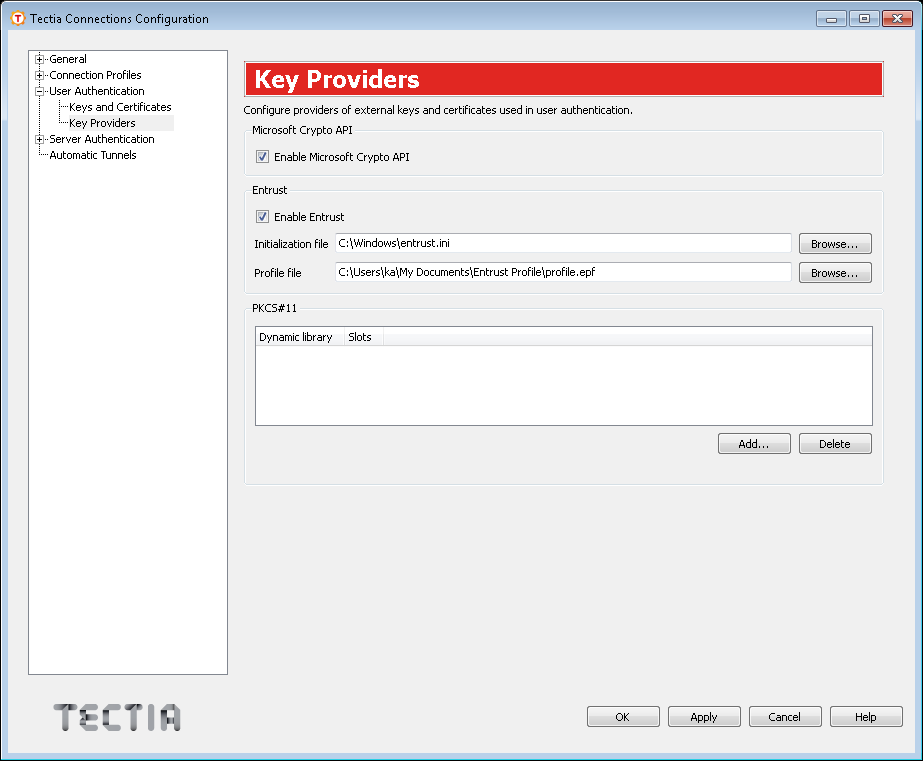
On the Key Providers page you can define the settings of external key providers used in user authentication. Available key providers are MSCAPI, Entrust, and PKCS#11.
Tectia Client can access keys via Microsoft Crypto API (MSCAPI). MSCAPI is a standard cryptographic interface used in Microsoft Windows systems.
Microsoft Crypto API (MSCAPI) providers can be enabled by selecting the Enable Microsoft Crypto API check box. If you enable the MSCAPI providers, you can use software keys and certificates created by Microsoft applications.
Select the Enable Entrust check box to enable using Entrust. Entrust is available on Microsoft Windows.
Enter the Initialization file
(*.ini) and Profile file
(*.epf).
By using the Entrust provider, Tectia Client can utilize keys and
certificates stored in an Entrust profile file (.epf). The
initialization file includes the basic Entrust PKI configuration (for
example the CA address).
When the provider is enabled for the first time, Entrust Entelligence will prompt for your Entrust password. As long as the Entrust provider is enabled, the password is asked each time Tectia Client is started.
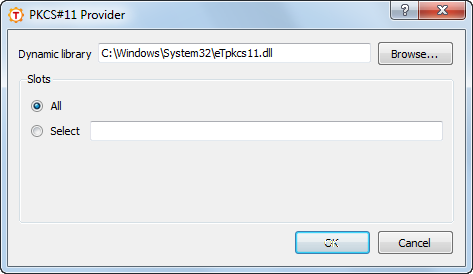
By using the PKCS#11 provider, Tectia Client can use keys and certificates stored in PKCS#11 tokens (for example, smart cards or USB tokens).
Click Add to define a PKCS#11 provider.
Use the Dynamic library to define a dynamic library containing the PKCS#11 driver.
Use the Slots to define slots. A slot is a
logical reader that potentially contains a token. Slots are manufacturer-
specific. They are defined with an integer. Examples: "0,1",
"0-3, !2", "2".
| |
Copyright  2012 Tectia Corporation
This software is protected by international copyright laws. All rights reserved.
Contact Information