|
     |
The instructions apply to Tectia Client (5.1 and later) and Tectia ConnectSecure on Windows. For more information, see Tectia Client User Manual or Tectia ConnectSecure Administrator Manual.
On Windows and Linux, you can use the Tectia Public-Key Authentication Wizard to generate a key pair.
New keys are generated in the Tectia Connections Configuration GUI. Select the Keys and Certificates page under User authentication and click New Key... to start the Public-Key Authentication Wizard.
The wizard will generate two key files, your private key and your
public key. The private key file has no file extension, and the public key
has the same base file name as the private key, but with .pub
as the file extension. The key files will be stored on your local
computer, in the user profile directory.
Public keys can be uploaded automatically to servers that have the SFTP subsystem enabled. The automatic upload can be done on the Keys and Certificates page of Tectia Configuration tool.
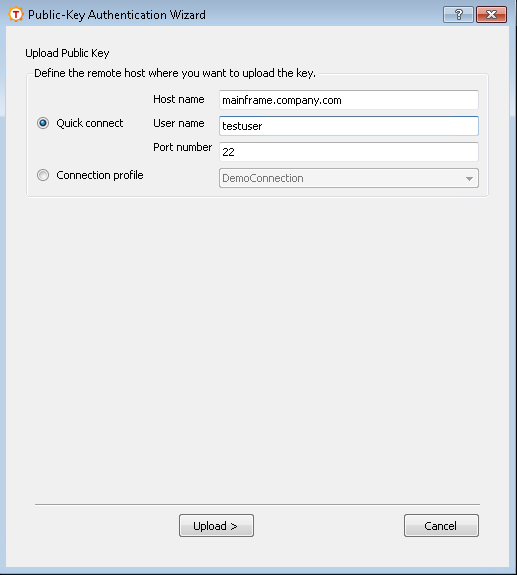
Select your key pair from the list and click Upload. The Upload Public Key dialog box opens.
Define the remote host where you want to upload the key.
Click Upload to start the upload.
If you are already connected to the remote server host, the key upload starts immediately. If you are not connected, you will be prompted to authenticate to the server (by default with password).
Make sure that public-key authentication is allowed in the Connection Broker
configuration on Client, in the default settings and in the
relevant connection profile (it is allowed by default).
The key pair can also be generated and transferred to the z/OS server by using command-line tools.
Create a key pair using ssh-keygen-g3. For non-interactive
use, the key can be generated without a passphrase with the -P
option.
C:\>ssh-keygen-g3 -t rsa -b 1536 -P win_key
Generating 1536-bit rsa key pair
   5 oOo.oOo.oOo.
Key generated.
1536-bit rsa, ClientUser@TECTIA_WIN, Fri Aug 25 2006 07:59:40
Private key saved to C:\Documents and Settings\ClientUser\Application
Data\SSH\UserKeys\win_key
Public key saved to C:\Documents and Settings\ClientUser\Application
Data\SSH\UserKeys\win_key.pub
Create a remote .ssh2 directory on the z/OS Server
(if it does not exist already):
C:\>sshg3 ServerUser@Server_zos mkdir .ssh2
Transfer the public key to the z/OS Server with conversion options:
C:\>scpg3 -a "C:\Documents and Settings\ClientUser\Application Data\SSH\
UserKeys\win_key.pub" ServerUser@Server_zos:˜/.ssh2/
Create the remote authorization file on the z/OS Server:
C:\>sshg3 ServerUser@Server_zos "echo Key win_key.pub >> .ssh2/authorization"
Make sure that public-key authentication is allowed in the Connection Broker
configuration on Client, in the default settings and in the
relevant connection profile (it is allowed by default).
| |
Copyright  2011 Tectia Corporation
This software is protected by international copyright laws. All rights reserved.
Contact Information