|
     |
Create a user group with administrator rights and allow all actions and services for the members of the group.
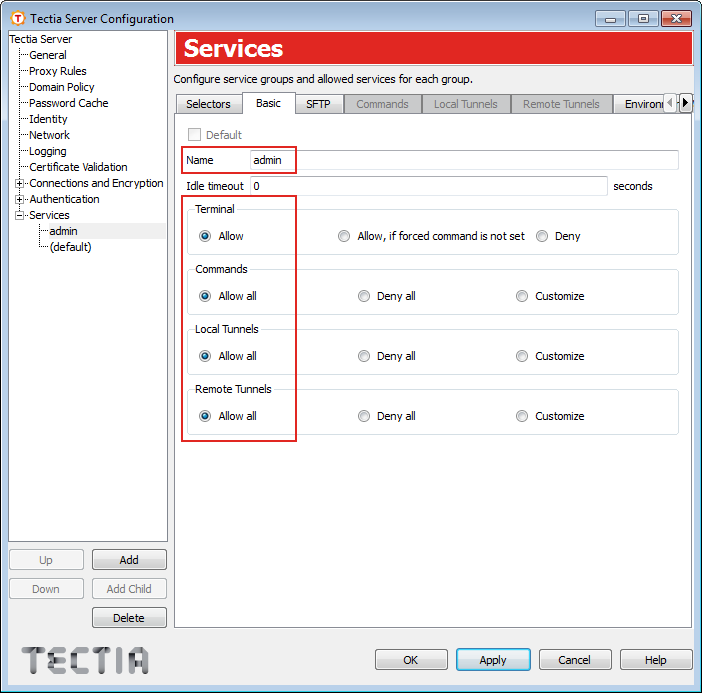
Under the Services page, click Add to create a group for administrators.
Tectia Server will use a placeholder name group1 for a newly created group.
On the Basic tab, name the group admin and choose
Allow or Allow all for all services,
Terminal, Commands, Local Tunnels, and Remote
Tunnels.
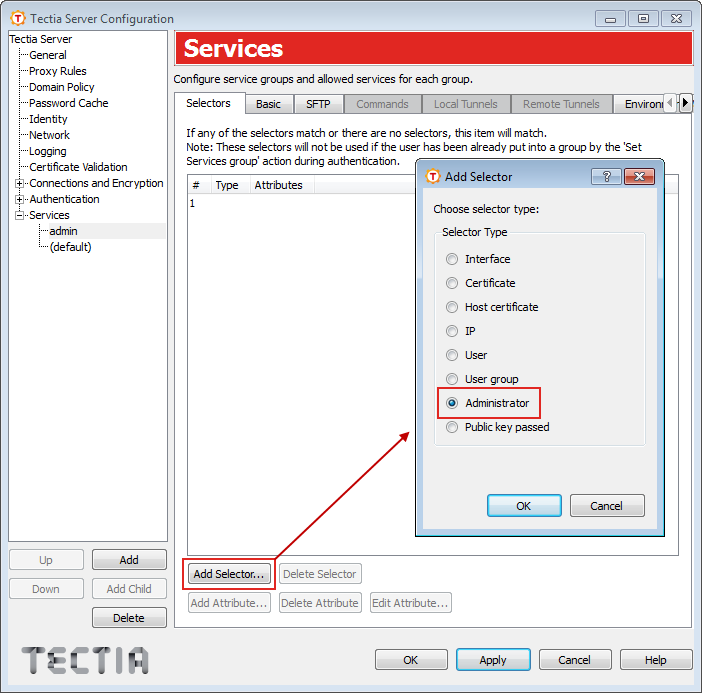
Go to the Selectors tab, and click Add Selector. On the Add Selector tab, choose selector type Administrator, and click OK.
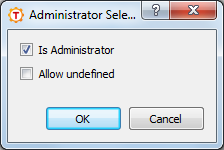
When the Administrator Selector view opens, select Is Administrator, and click OK.
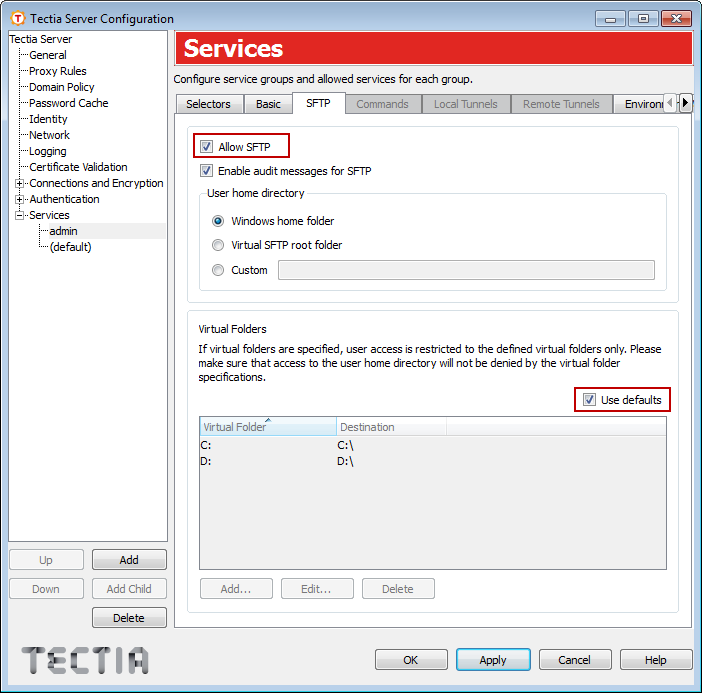
On the SFTP tab, allow the SFTP service for the
admin group, and keep the default settings.
| |
Copyright  2024 SSH Communications Security Corporation
This software is protected by international copyright laws. All rights reserved.
Contact Information