

|
     |
PrivX Desktop can be seamlessly used with PrivX privileged-access-management (PAM) solution to use ephemeral certificate authentication enabled with OIDC (OpenID Connect) browser-based user authentication to PrivX.
To enable Public-Key-PrivX authentication in PrivX Desktop GUI:
Define the PrivX Instance configuration. To do this, click ⋮ menu and select Configuration. Go to User Authentication→PrivX Instances to add a new instance.
Name - display name, for example PAM.
URL - complete URL, for example https://privx.example.com of the PrivX PAM of your company.
CA Certificate (optional) - path to the trusted Certification Authority certificate file in PEM format including any issuing Certificate Authority Certificate chain if the PrivX Instance's TLS server certificate cannot be successfully validated with trusted CA Certificate(s) in the Operating System's certificate store.
![[Note]](images/note.gif) | Note |
|---|---|
If the PrivX Instance's TLS Server certificate has been enrolled from your internal company CA, it is recommended to add the CA certificate(s) to the Operating System trust store so that both PrivX Desktop and the Operating System default browser can successfully validate it without additional configuration. |
To verify the TLS settings and PrivX API connection, select the PrivX Instance and click Test connectivity.... On Windows, the connection may be blocked by the Windows firewall and it has to be allowed for the PrivX authentication to work.
Click Apply to take the configuration into use.
| Note |
|---|---|
Public-Key-PrivX authentication can be configured as the preferred user authentication method by default in General→Default Connection→Authentication, in specific Connection Profiles or alternatively selected for a new connection in Quick Connect. |
Return to PrivX Desktop GUI. In New Connection→Quick Connect, the PrivX Instance Public-Key-PrivX (PAM) can now be selected as Authentication method.
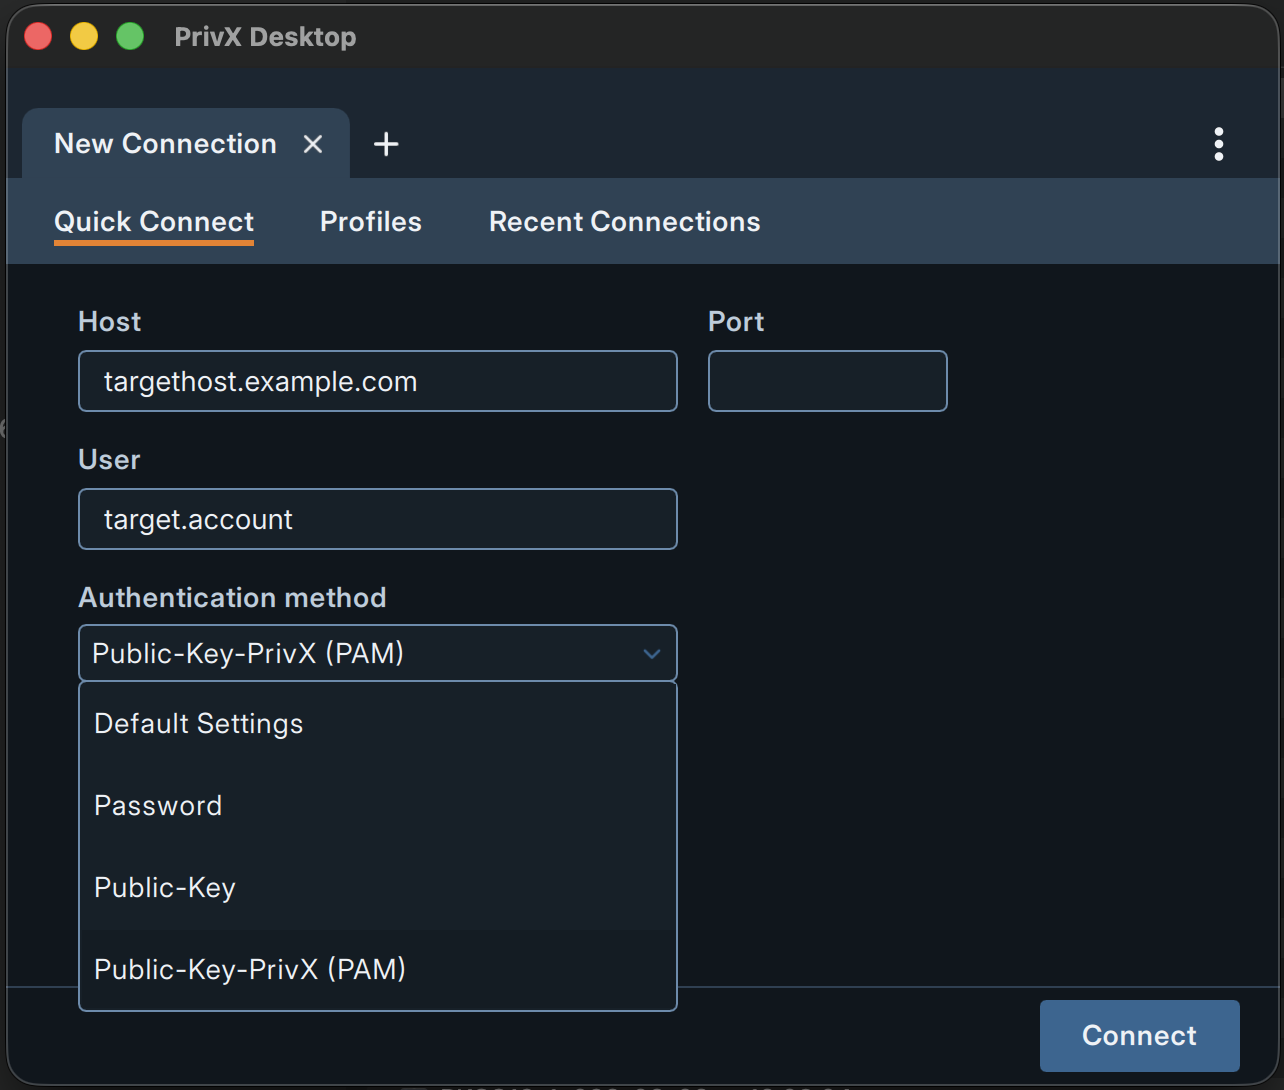
Connect to a remote-host that has been configured to trust the PrivX OpenSSH certificate-based authentication for the target account.
PrivX Desktop connects directly to the target host. After the Secure Shell server has been authenticated, the server may send a banner message to accept. Once the user authentication phase begins, the default Operating System browser is launched to authenticate the PrivX user in a new tab.
| Note |
|---|---|
Typically, the PrivX user account identifies the real user and the target account is a shared role-based account. |
Once PrivX user authentication is successful, the PrivX Desktop automatically uses its ephemeral key to obtain a short-lived certificate that contains the user's roles from PrivX. This certificate is used to authenticate to the target account on the target server and it is discarded after use.
| Note |
|---|---|
If a new certificate is needed, the existing session to PrivX is used. PrivX user re-login is not needed as long as the PrivX user session is valid and the PrivX Desktop Connection Broker remains running. |
Prerequisites on PrivX Instance:
PrivX user a user account that maps to the intended PrivX role(s).
Use with PrivX agent option enabled for the role(s) that grant access to the target(s).
connections-authorize permission enabled for the role(s) that grant access to the target(s).
| |